When your basement floods, you’ve got to act fast—shut off power and gas immediately, then document everything with photos before the damage gets worse.
Next, move valuables to dry ground and pump out the water quickly, since mold loves moisture.
Disinfect hard surfaces with a bleach solution, check daily for mold spots, and call your insurance company right away.
Once you’ve tackled the emergency, tracking down what caused the flood helps you prevent it from happening again.
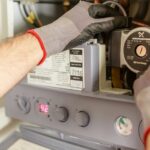
Shut Off Basement Power and Gas: First Priority

When you’re staring at a flooded basement, your first instinct might be to wade in and start cleaning—don’t do it. Standing water and electricity are a dangerous combination that can cause electric shock or electrocution. Here’s what you need to do first: locate your circuit breaker. If it’s in the basement, call an electrician to shut off power safely. If it’s elsewhere, shut off power to your entire home before entering flooded areas. Next, check for gas dangers. If you smell gas or hear your CO alarm, turn off the gas supply and call emergency services immediately—then evacuate. Once an electrician confirms electrical hazards are addressed, you can enter safely and begin recovery.
Check if It’s Safe to Enter the Flooded Area

After you’ve handled the power and gas situation, you might want to rush downstairs and start salvaging your stuff—but wait. Before you wade in, check for electrical hazards. If you smell gas or hear a CO alarm, evacuate immediately and call emergency services. Don’t step into standing water—it hides dangerous contamination and electrical risks you can’t see.
Put on appropriate PPE like boots and gloves for protection. If you’re unsure about safety, have an electrician confirm the power’s truly off before entry. Once cleared, you can start planning water removal and salvaging.
Treat your flooded basement like a potentially hazardous zone until proven otherwise. This cautious approach keeps you safe and part of the group of people who get through basement floods without incident.
Document All Flooding Damage With Photos

Why should you grab your camera before you grab a mop? Because basement flooding photos are your best friend when filing insurance claims. You’ll want to document everything—water levels, affected items, and visible damage—starting from when you first discover the flood through the entire water removal process.
Take pictures at each stage: entry, extraction, drying, and final remediation. Don’t skip the safety hazards either. Photograph exposed wiring, standing water depths, and damaged electrical components so you’ve got solid evidence of what happened.
Create a dated photo log linking each image to its corresponding cleanup phase. This water damage documentation becomes your item inventory and proves the flood aftermath to your insurance company. Think of it as your visual testimony—it’ll save you headaches and potentially thousands of dollars.
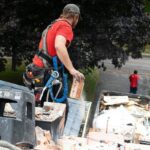
Move Valuables and Upholstered Items to Dry Ground

Now that you’ve got those photos locked in, it’s time to actually save your stuff—because pictures of ruined memories aren’t the same as keeping the real thing. Move valuables and upholstered furniture out of standing water immediately; every hour counts during a basement flood. Grab items with sentimental or critical value first, then tackle boxes and water-logged materials next. Transport everything to dry ground quickly to prevent further saturation and damage. Document the condition of each salvaged item for your insurance claim—this protects you later. Work carefully to stay safe; if water’s been sitting too long, it might contain harmful contaminants, so avoid direct contact. Getting your belongings to safety isn’t just practical; it’s how you reclaim your space and move forward after this mess.
Remove Basement Water Quickly to Prevent Mold

Once that water’s sitting in your basement, you’ve got a ticking clock—mold loves moisture and will start growing within 24 to 48 hours if you don’t act fast.
Your first move? Get that water out. Rent a wet vacuum or pump to extract standing water as quickly as possible. If the water’s contaminated or unsanitary, call professionals who’ll handle it safely with antimicrobial treatment.
| Step | Tool | Purpose |
|---|---|---|
| Extract | Wet vacuum or pump | Remove standing water |
| Dry | High-capacity fans | Circulate air |
| Dehumidify | Dehumidifiers | Remove moisture from air |
| Monitor | Moisture meter | Track humidity levels |
After pumping, deploy industrial blowers and dehumidifiers everywhere. Document everything with photos for insurance. Track daily moisture levels—you’re preventing water damage and mold prevention simultaneously. Open windows cautiously; you don’t want to introduce more problems. Stay vigilant during your drying process.
Dry the Basement With Fans and Dehumidifiers

After you’ve hauled out all that water, you’ll want to get serious about drying because moisture hanging around is basically a VIP invitation for mold to move in. You’ve got three main jobs ahead: creating good airflow with fans and blowers, picking the right dehumidifier and putting it where it’ll actually work, and then staying on top of things by checking moisture levels until your basement feels dry again. With steady equipment running and regular monitoring, you can prevent mold from developing in your basement.
Airflow And Circulation Methods
Why does your basement still feel like a swamp even after you’ve mopped up all the standing water? The answer is air circulation. You’ve got to get that stagnant, moisture-heavy air moving.
Position your fans strategically to create cross-ventilation, pushing air from the dry areas toward the dampest zones. This forces moisture out faster than you’d think possible. Run your dehumidifiers continuously—seriously, don’t turn them off—ideally with a drain hose attached so collected water drains away automatically.
Pair your fans and dehumidifiers with manual drying. Use dry mops and absorbent towels on surfaces while equipment runs. This combination accelerates your drying process significantly.
Monitor daily for condensation or musty odors. Adjust fan placement as needed. You’re aiming for relative humidity below 50-60% to stop mold before it starts. That’s your target.
Dehumidifier Selection And Placement
How do you pick the right dehumidifier when you’re standing in your soggy basement surrounded by puddles and water damage? You’ll want an industrial-strength unit that targets high humidity levels effectively. Position your dehumidifier in a corner with at least 18 inches of airflow clearance from walls—think of it as giving the machine breathing room. Run it continuously alongside fans until your moisture meter reads below 50% relative humidity, aiming for a daily humidity reduction of 15–25%. Empty and recharge desiccant or reservoir units regularly to maintain peak drying performance. Log moisture readings consistently throughout the drying process to track your progress. This systematic approach allows all structural surfaces and porous materials to reach proper dryness before restoration begins, getting your basement back to normal faster.
Drying Timeline And Monitoring
Once you’ve got the standing water out, the real waiting game begins—and yeah, it’s about as fun as watching paint dry (except you’re literally doing that). Your basement drying timeline typically spans three to five days, depending on how wet things got and your ventilation setup.
Grab industrial blowers and fans immediately—they’re your new best friends. Position dehumidifiers strategically throughout the space to tackle moisture removal aggressively. Open basement windows if outdoor humidity’s lower than inside, helping natural ventilation work in your favor.
Here’s the unglamorous part: daily mold monitoring matters. Check corners and surfaces constantly; mold loves hiding spots. Use dry mops on surfaces to speed things along, minimizing mold risk. Stay vigilant during post-flood drying monitoring. Quick water removal combined with proper equipment shortens recovery time significantly, getting your basement back to normal faster.
Call Your Insurance Company to File a Claim

After you’ve tackled the immediate cleanup and caught your breath, it’s time to contact your insurance company.
Call your homeowners or renters insurance agent right away to file a claim. They’ll explain what your policy covers and whether flood insurance applies (spoiler: standard policies often don’t cover floods, which is annoying but important to know). Your agent becomes your guide, answering questions about next steps and connecting you with restoration professionals.
Gather your documentation: photos of standing water, damaged items, and post-cleanup conditions. Keep a chronological record of everything from when the flood started through cleanup completion. This evidence supports your basement flood claim and helps your insurer understand the situation. Coordinate timing with them—they’ll tell you about required remediation and what happens next.
Disinfect Affected Areas With Bleach and Warm Water
Floodwater carries all kinds of nasty stuff—bacteria, mold spores, and things you really don’t want to think about—so cleaning up the standing water is only half the battle. You need to disinfect everything it touched.
Here’s your approach: mix 1 cup of bleach per gallon of warm water, and you’re ready to tackle those affected surfaces. Throw on gloves, eye protection, and a mask—seriously, don’t skip the PPE—and crack open windows for ventilation. This stuff gets intense.
Scrub down hard surfaces like concrete and tile, following the bleach product’s contact time instructions. For porous surfaces like drywall or carpet backing, honestly, call a professional; bleach won’t cut it there.
After disinfection, rinse with clean water if needed and let everything air dry completely.
Check Daily for Mold and Treat It Immediately

You’ll want to inspect your basement daily for any fuzzy or discolored spots—it’s tedious, but catching mold early stops it from spreading through your walls. The moment you spot something suspicious, treat it right away with bleach and warm water, scrubbing thoroughly and then drying the area completely so mold doesn’t return. If you’re dealing with a large area or you’re worried about exposure, don’t hesitate to call in the professionals who’ve got the equipment and expertise to handle serious mold situations safely.
Daily Mold Inspection Schedule
How’d you like to play detective in your own basement? You’re not alone—after a basement flood, mold inspection becomes your new routine. Here’s your daily mold check plan:
- Morning patrol: Scan damp walls, flooring, and stored items for fuzzy spots or discoloration
- Gear up first: Slip on gloves, an N95 mask, and goggles before inspecting—safety matters
- Document everything: Snap photos of any mold findings to track progression
- Humidity control: Run dehumidifiers and fans, keeping indoor humidity below 50%
Spot something suspicious? Grab warm water mixed with bleach (one cup per gallon), treat immediately, then recheck after drying. If mold spreads beyond small areas, call a professional mold remediation service. Your daily vigilance prevents a small problem from becoming a larger issue, keeping your basement safer and your peace of mind intact.
Immediate Treatment Methods
The clock’s ticking once you spot mold in your basement, so don’t wait around hoping it’ll disappear on its own—it won’t. Mold spreads fast in damp conditions, multiplying like unwanted houseguests. Grab a bleach solution mixed with warm water and treat visible spots immediately to slow its growth. Simultaneously, deploy fans, industrial blowers, and dehumidifiers throughout your basement during the water removal process. These tools work together creating airflow that addresses the mold risk directly. Document everything in a daily log—moisture levels, mold sightings, and cleaning steps—because your insurance claims depend on this record. When you’re overwhelmed or suspect serious contamination, call a professional restoration service. They’ll handle antimicrobial treatment properly, keeping your family safe while protecting your investment.
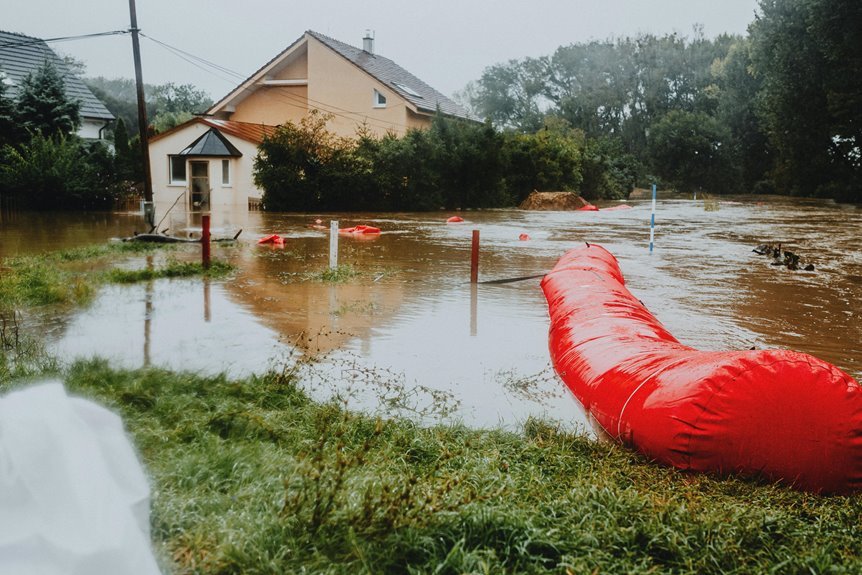
Find the Flood Source and Plan Prevention Upgrades
Once you’ve dealt with the immediate mess, it’s time to play detective and figure out what went wrong in the first place. Finding your flood source means investigating the usual suspects:
- Sump pump failure – Your pump might’ve given up without warning
- Burst pipes – Hidden leaks create serious water intrusion problems
- Backed-up drainage – Clogged gutters and poor drainage grading trap water
- Sewer backups – The worst-case scenario nobody wants to face
Next, inspect your foundation cracks and drainage system carefully. Once you’ve identified what happened, plan upgrades like installing reliable backups, basement sealing, and weatherproofing improvements. Consider upgrading your sump pump entirely. Schedule maintenance and testing annually—it’s your best defense against future flooding.