You should insulate basement walls if you’re finishing the space into living rooms or battling moisture and cold—but you might skip it if your ceiling’s already insulated and the basement stays unfinished.
Cold climates make wall insulation necessary; warmer areas can get by with ceiling insulation alone.
Check your local building codes first, fix any moisture problems before insulating, and consider hiring a professional for spray foam or vapor barrier installation.
The specifics vary based on your climate and plans.
Why Basements Lose Heat and Moisture Through Concrete Walls

Ever wonder why your basement feels like a freezer even when the rest of your house is toasty? Your concrete basement walls are the culprits. They’re in constant contact with cold, wet dirt outside, creating what experts call thermal transfer—basically, the ground’s chill seeping straight into your living space. Your basement walls act like a highway for that cold, pulling heat right out of your home and your wallet. But there’s another sneaky problem: moisture. As warm indoor air hits those frigid concrete walls, it creates condensation, which invites mold and mildew to move in uninvited. That’s where a vapor barrier comes in. Without proper moisture protection and insulation on those basement walls, you’re fighting a losing battle against cold floors, drafts, and dampness that’ll make anyone miserable.
Code Requirements for Basement Wall Insulation

Now that you understand why your basement is losing ground against cold and moisture, you should know that fixing it may be required by law. Building codes in your area likely mandate basement wall insulation, though requirements vary by climate zone and whether you’re finishing the space. If you’re completing a basement renovation, code probably demands insulation on those concrete walls. Here’s what matters: vapor barriers and moisture control aren’t optional—they’re legally required, particularly if you live in a humid or flood-prone area. The benefit? Many codes let you choose between wall insulation or ceiling insulation, giving you flexibility. Check your local building department’s specific code requirements before starting any project. They’ll tell you exactly what your basement needs.
Walls or Ceiling: Which Should You Insulate?
You’ve got some flexibility here—you can meet code by insulating either your basement walls or ceiling, not both, which honestly feels like a relief when you’re budgeting. Your best move depends on what you’re actually doing with the space: if you’re finishing it into a living area, you’ll want to insulate those concrete walls, but if you’re keeping it unfinished for storage or utilities, a well-insulated ceiling provides good performance for comfort and energy savings. Think about your basement’s moisture situation and how you plan to use it, because that choice between walls and ceiling will shape both your upfront costs and how comfortable your basement feels down the road.
Code Compliance Options
When it comes to basement insulation, you’ve got options—and that’s actually good news because it means you can pick what works best for your situation. Building codes don’t force you to insulate both your basement walls and ceiling; either one typically satisfies code compliance. You can choose ceiling insulation alone if you’re keeping your basement unfinished and moisture control isn’t a major worry. However, if you’re planning to finish the space or live in a damp climate, insulating basement walls becomes the better choice. Wall insulation lets you add a vapor barrier for improved moisture control, protecting concrete from moisture damage. Think of it this way: ceiling insulation handles temperature, while wall insulation provides comfort and protection together. Your choice depends on your specific needs and how you’ll actually use that space.
Basement Usage Determines Choice
Your basement’s future pretty much decides whether you should insulate the walls or the ceiling.
If you’re finishing your basement into a hangout space, wall insulation becomes your best choice. You’ll notice the concrete won’t steal your heat anymore, and you’ll actually want to spend time down there. But if that basement’s staying unfinished—basically a storage zone—ceiling insulation does the heavy lifting by protecting your upper floors from temperature swings.
Think about your basement usage honestly. Are you planning movie nights or just stashing boxes? Wall insulation tackles moisture considerations head-on when you’re creating living space. Ceiling insulation works fine for utility areas where you’re not concerned about comfort. Match your choice to reality, not wishful thinking, and you’ll make the right decision.
Energy Efficiency Trade-Offs
Now that you’ve picked where you’re heading with your basement, it’s time to figure out which insulation choice actually saves you money and keeps you comfortable year-round.
The honest truth: you’re choosing between wall insulation and basement ceiling insulation, and both work—just differently. Insulating your ceiling typically costs less and boosts your R-value efficiently, especially if you’re leaving the space unfinished. Wall insulation works better when you’re finishing the basement into a livable room. The trade-off? Consider these factors:
- Budget constraints limit your options
- Climate zone determines priority
- Moisture barriers matter equally for both
- Long-term comfort depends on your usage plans
- Finishing timeline influences which makes sense now
Neither choice is wrong—you’re just picking what fits your situation and wallet best.
How to Choose Between Wall and Ceiling Insulation

Should you insulate your basement walls or the ceiling instead? Both work, so your choice depends on your plans and budget.
If your basement’s unfinished, ceiling insulation wins—it blocks heat loss without eating up wall space and reduces sound too. You’re basically creating a blanket above without cramping your style.
Planning to finish those basement walls eventually? Wall insulation makes sense. It tackles heat loss through concrete directly and maximizes thermal performance when you’re ready to add drywall.
Got moisture concerns? That’s where moisture barriers matter. They protect your insulation and keep things dry when you choose walls.
The smart approach? Check your HVAC setup and future plans first. Then pick whichever option aligns with what you’re actually doing down there. It’s cost-effective and practical.
If Your Ceiling Is Already Insulated?
If your ceiling’s already insulated, you might think you’re off the hook for wall insulation—and honestly, you’re partially right since that ceiling’s doing some serious heavy lifting as a thermal barrier. But here’s the thing: whether you actually need those walls insulated depends on what you’re planning to do with the space, because finishing your basement or dealing with moisture issues might push you toward wall insulation anyway, even if it’s not strictly required for temperature control. So before you celebrate and move on, think about your endgame—are you finishing this space, worried about dampness, or just trying to keep heating costs down?
Ceiling Insulation Eliminates Wall Need
Ever wonder why some basements stay cozy without insulated walls while others feel like freezers? If your ceiling’s already insulated, you might not need wall insulation at all. Here’s why:
- Thermal barrier works: Your ceiling insulation creates a solid shield between upstairs and your basement space
- Heat stays put: Less warm air escapes through floors above, reducing temperature swings
- Finished basements benefit most: When you’ve finished your basement, ceiling insulation handles soundproofing and comfort effectively
- Wall insulation unnecessary: Testing shows many basements maintain code compliance relying on ceiling protection alone
- Drafts decrease: A ceiling barrier limits air movement between levels naturally
You have options here. If your ceiling insulation performs well and you’re meeting comfort goals, wall insulation may not be necessary for your situation. It’s a practical consideration.
Thermal Barrier Coverage Requirements Met
When your basement ceiling’s already packed with insulation, you’re probably wondering whether you really need to insulate those basement walls too—and honestly, the answer might be different than expected. Here’s the thing: a solid ceiling insulation actually creates a thermal barrier that stops heat from escaping upward, which can satisfy building codes without wall insulation in many cases. That’s pretty convenient, right? Your ceiling does the heavy lifting, creating that protective shield between your living space and the cold ground below. However—and this is important—if you’re worried about moisture control or live somewhere with tricky ventilation issues, you might still need wall insulation. So check your local code requirements first. That way, you’ll know exactly what your basement needs.
Finishing Plans Drive Insulation Choice
So here’s where your finishing plans actually matter—a lot more than you’d think. Your ceiling insulation gives you a head start, but what you do with your basement walls depends entirely on what you’re building down there.
Consider these finishing scenarios:
- Full finished space: You’ll want wall insulation for comfort and energy efficiency
- Partial finishing: Leave some areas unfinished? You might need walls insulated anyway for code compliance
- Future expansion plans: Insulate now to avoid redoing work later
- Moisture concerns: Wall insulation helps protect against damp basement issues
- Budget flexibility: Finishing walls with EPS or drywall works well alongside your existing ceiling insulation
The bottom line? Think through your actual finishing plans before deciding on wall insulation. Your decision today saves headaches and money tomorrow.
Cold Floors, Drafts, and Condensation: When to Insulate

Why do basements feel like walk-in freezers even when the rest of your house is toasty? Cold basement walls pull heat right out of the air, creating chilly floors and drafts that make you shiver. Ground moisture seeping through uninsulated basement walls compounds this problem, leaving you uncomfortable and your energy bill higher.
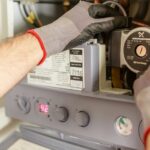
Insulating your basement walls creates a thermal barrier between your living space and that damp exterior ground. You’ll notice warmer floors and fewer drafts right away. Choose from rigid foam boards or sprayed foam—both resist moisture effectively. Just remember: if you go with rigid foam, you’ll need a fire-rated drywall barrier on top for safety. Pair wall insulation with proper moisture control, and you have a comfortable basement that keeps your energy costs down.
Fix Moisture Before Insulating
Before you even think about insulation, you need to identify and address any moisture problems hiding in your basement—including leaks, dampness, standing water, and that musty smell indicating something is wrong. If you skip this step and insulate over wet walls or poor drainage, you’re basically trapping moisture behind the insulation like a moisture time bomb, which leads to mold, rotting wood, and structural damage that’ll cost you significantly more to fix later. Start by assessing what’s actually causing the dampness, fix any water damage and seal up leaks and seepage, then bring in a professional if you’re unsure, because getting moisture under control first makes everything else—including insulation—work better.
Assess Current Moisture Issues
Here’s the thing about basement insulation—it’s kind of like putting a nice sweater on a wet dog. You’re not solving the real problem; you’re just trapping moisture behind the insulation, which nobody wants.
Before you grab that insulation, you’ll want to assess your current moisture situation:
- Test your humidity levels to see if condensation’s already a problem
- Look for basement dampness, standing water, or that musty smell
- Check your roof, gutters, and downspouts for leaks
- Consider a professional moisture assessment if you’re unsure
- Evaluate your vapor barrier strategy based on your climate
High moisture levels need proper ventilation or dehumidification first. Don’t skip this step—it’s the foundation (pun intended) for successful basement insulation that’ll actually work with you, not against you.
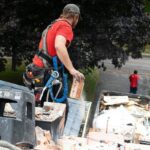
Address Water Damage First
If you’ve got water sneaking into your basement, insulation won’t fix it—it’ll just hide the problem like sweeping dirt under a rug. You’ve got to tackle moisture and water damage head-on first.
Start by fixing structural issues: seal those cracks, clear your gutters and downspouts, and address basement leaks directly. Use a moisture meter to check if your walls are actually dry before proceeding. If moisture’s still lingering, you’ll need a vapor barrier and solid ventilation to manage humidity after insulating.
Think of it this way: insulation traps whatever’s already there. Moisture plus insulation equals mold growth and ruined materials. Fix the water problem, verify dryness, then install your insulation with confidence. Your basement—and your wallet—will thank you.
Seal Leaks And Seepage
Now that you understand the basics—moisture and insulation don’t mix—it’s time to find where that water’s coming from. You’ll want to systematically inspect your basement and seal every leak and seepage point before you add insulation.
Here’s your action plan:
- Check foundation cracks and seal them with hydraulic cement or epoxy injections
- Install proper drainage systems around your foundation to redirect water away
- Apply vapor barriers on warm-side walls after identifying moisture sources
- Fix gutters and downspouts so rainwater doesn’t pool near your basement
- Test for hidden moisture intrusion using moisture meters before proceeding
Getting these leaks handled now prevents mold, wood rot, and wasted insulation money later. You’re building a solid foundation for success.
Best Materials for Insulating Concrete Basement Walls

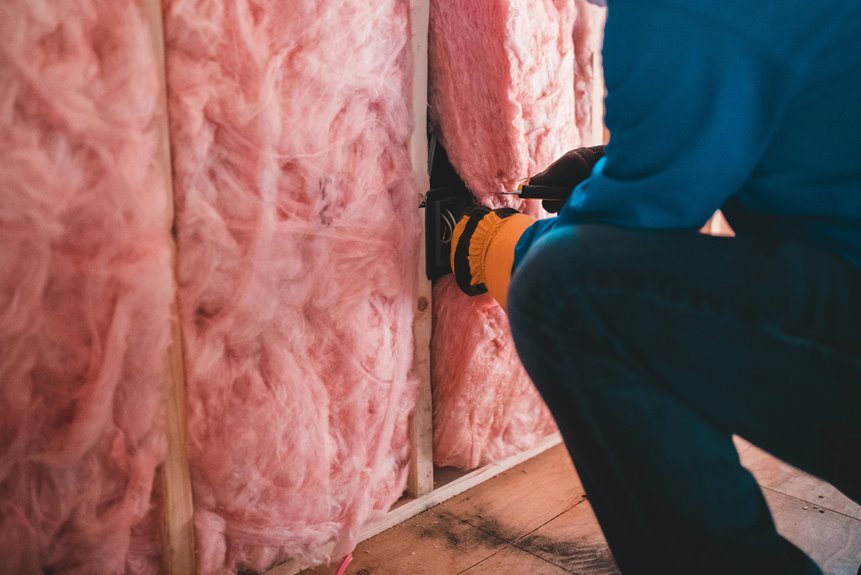
When you’re staring at that cold, damp concrete basement wall and wondering what’ll actually stop your energy bills from climbing, you’ve got some solid options—literally. XPS and polyiso rigid foam boards are workhorses here, giving you R5 to R6 per inch of insulation without taking up tons of space. Want maximum performance? Spray foam delivers R6.5 to R7 per inch and seals everything airtight, though it costs more and needs professionals. The real trick is adding a moisture barrier behind whatever you choose, protecting your investment from that sneaky basement dampness trying to ruin everything. These materials work together, not against each other, creating a fortress against heat loss and moisture problems that’ll let you use your basement year-round.
Insulating Joist Cavities for Basement Energy Savings
Ever notice how your basement ceiling feels ice-cold even when you’ve cranked up the heat upstairs? You’re not alone—that’s where insulating basement joist cavities helps reduce energy waste.
Here’s what you should know:
- Joist cavities trap heat loss between your living space and unconditioned areas below
- Fiberglass batts, mineral wool, and spray foam work well for filling these spaces
- Proper installation matters—avoid compressing materials and leaving gaps that waste your effort
- Moisture control is important—pair insulation with barriers and ventilation to prevent mold
- Finished basements benefit too—integrate insulation seamlessly with drywall or paneling
When you insulate these cavities properly, you’ll notice warmer feet and lower heating bills. It’s a straightforward upgrade that delivers results throughout winter months.
Regional Climate: How It Affects Basement Insulation Choices

Why does your neighbor in Maine need different basement insulation than someone in Georgia? Your regional climate directly shapes which insulation strategy works best for your home. In harsh, cold climates, you’ll want higher R-values and serious moisture control because freezing temperatures and humidity create condensation problems behind walls. Meanwhile, warmer regions prioritize above-ground insulation over basements since you’re fighting heat, not ice.
| Climate Zone | Focus Area | Key Priority |
|---|---|---|
| Cold (Maine/Vermont) | Basement walls + above-ground | Vapor barriers & moisture |
| Temperate | Above-ground primarily | Basic moisture control |
| Warm (Georgia/Florida) | Above-ground walls | Heat reflection |
Your local building codes reflect this too. They’re basically saying, “Here’s what actually works where you live.” So before insulating, check what your neighbors are doing right—you’re learning from a community that’s already figured out what works.
Before You Insulate: Essential Prep Work

Before you grab that insulation and start stuffing it between your basement walls, hold up—there’s some important homework you’ve got to do first.
Getting your basement ready means tackling a few critical tasks:
Getting your basement ready means tackling moisture problems, running an energy audit, checking building codes, and planning ventilation.
- Fix moisture problems like leaks or dampness before they ruin your insulation efforts
- Run a home energy audit to see what you’re working with and set realistic goals
- Check local building codes for required R-values (that’s your insulation’s heat-blocking power) and vapor barrier rules
- Assess your basement type—finished, unfinished, or crawl space each needs different approaches
- Plan moisture control and ventilation so you’re not trapping water behind your walls
This prep work prevents expensive mistakes. You’ll understand exactly what your basement needs, what your area requires, and how moisture control protects your investment. Taking these steps now saves headaches later.
When to Hire a Professional

Now that you’ve done your homework and got your basement in good shape, here’s the honest truth: some jobs are better left to the pros. You’ll want a professional contractor if you’re dealing with moisture control issues or existing water damage—getting this wrong means your insulation fails, and that’s expensive. Spray foam installation, fire-rated materials, and proper vapor barrier setup require expertise to meet local codes. If radon’s a concern, you’ll need specialized testing and mitigation help. Complex HVAC integration and R-value planning also benefit from professional input. Finally, structural work like wall removal demands licensed contractors who handle permits and safety compliance. Knowing your limits here saves you headaches and money down the road.